System Scaffolding
Overview
Let's assemble scaffolding to help create the sturdy and safe structure needed for construction projects.Materials
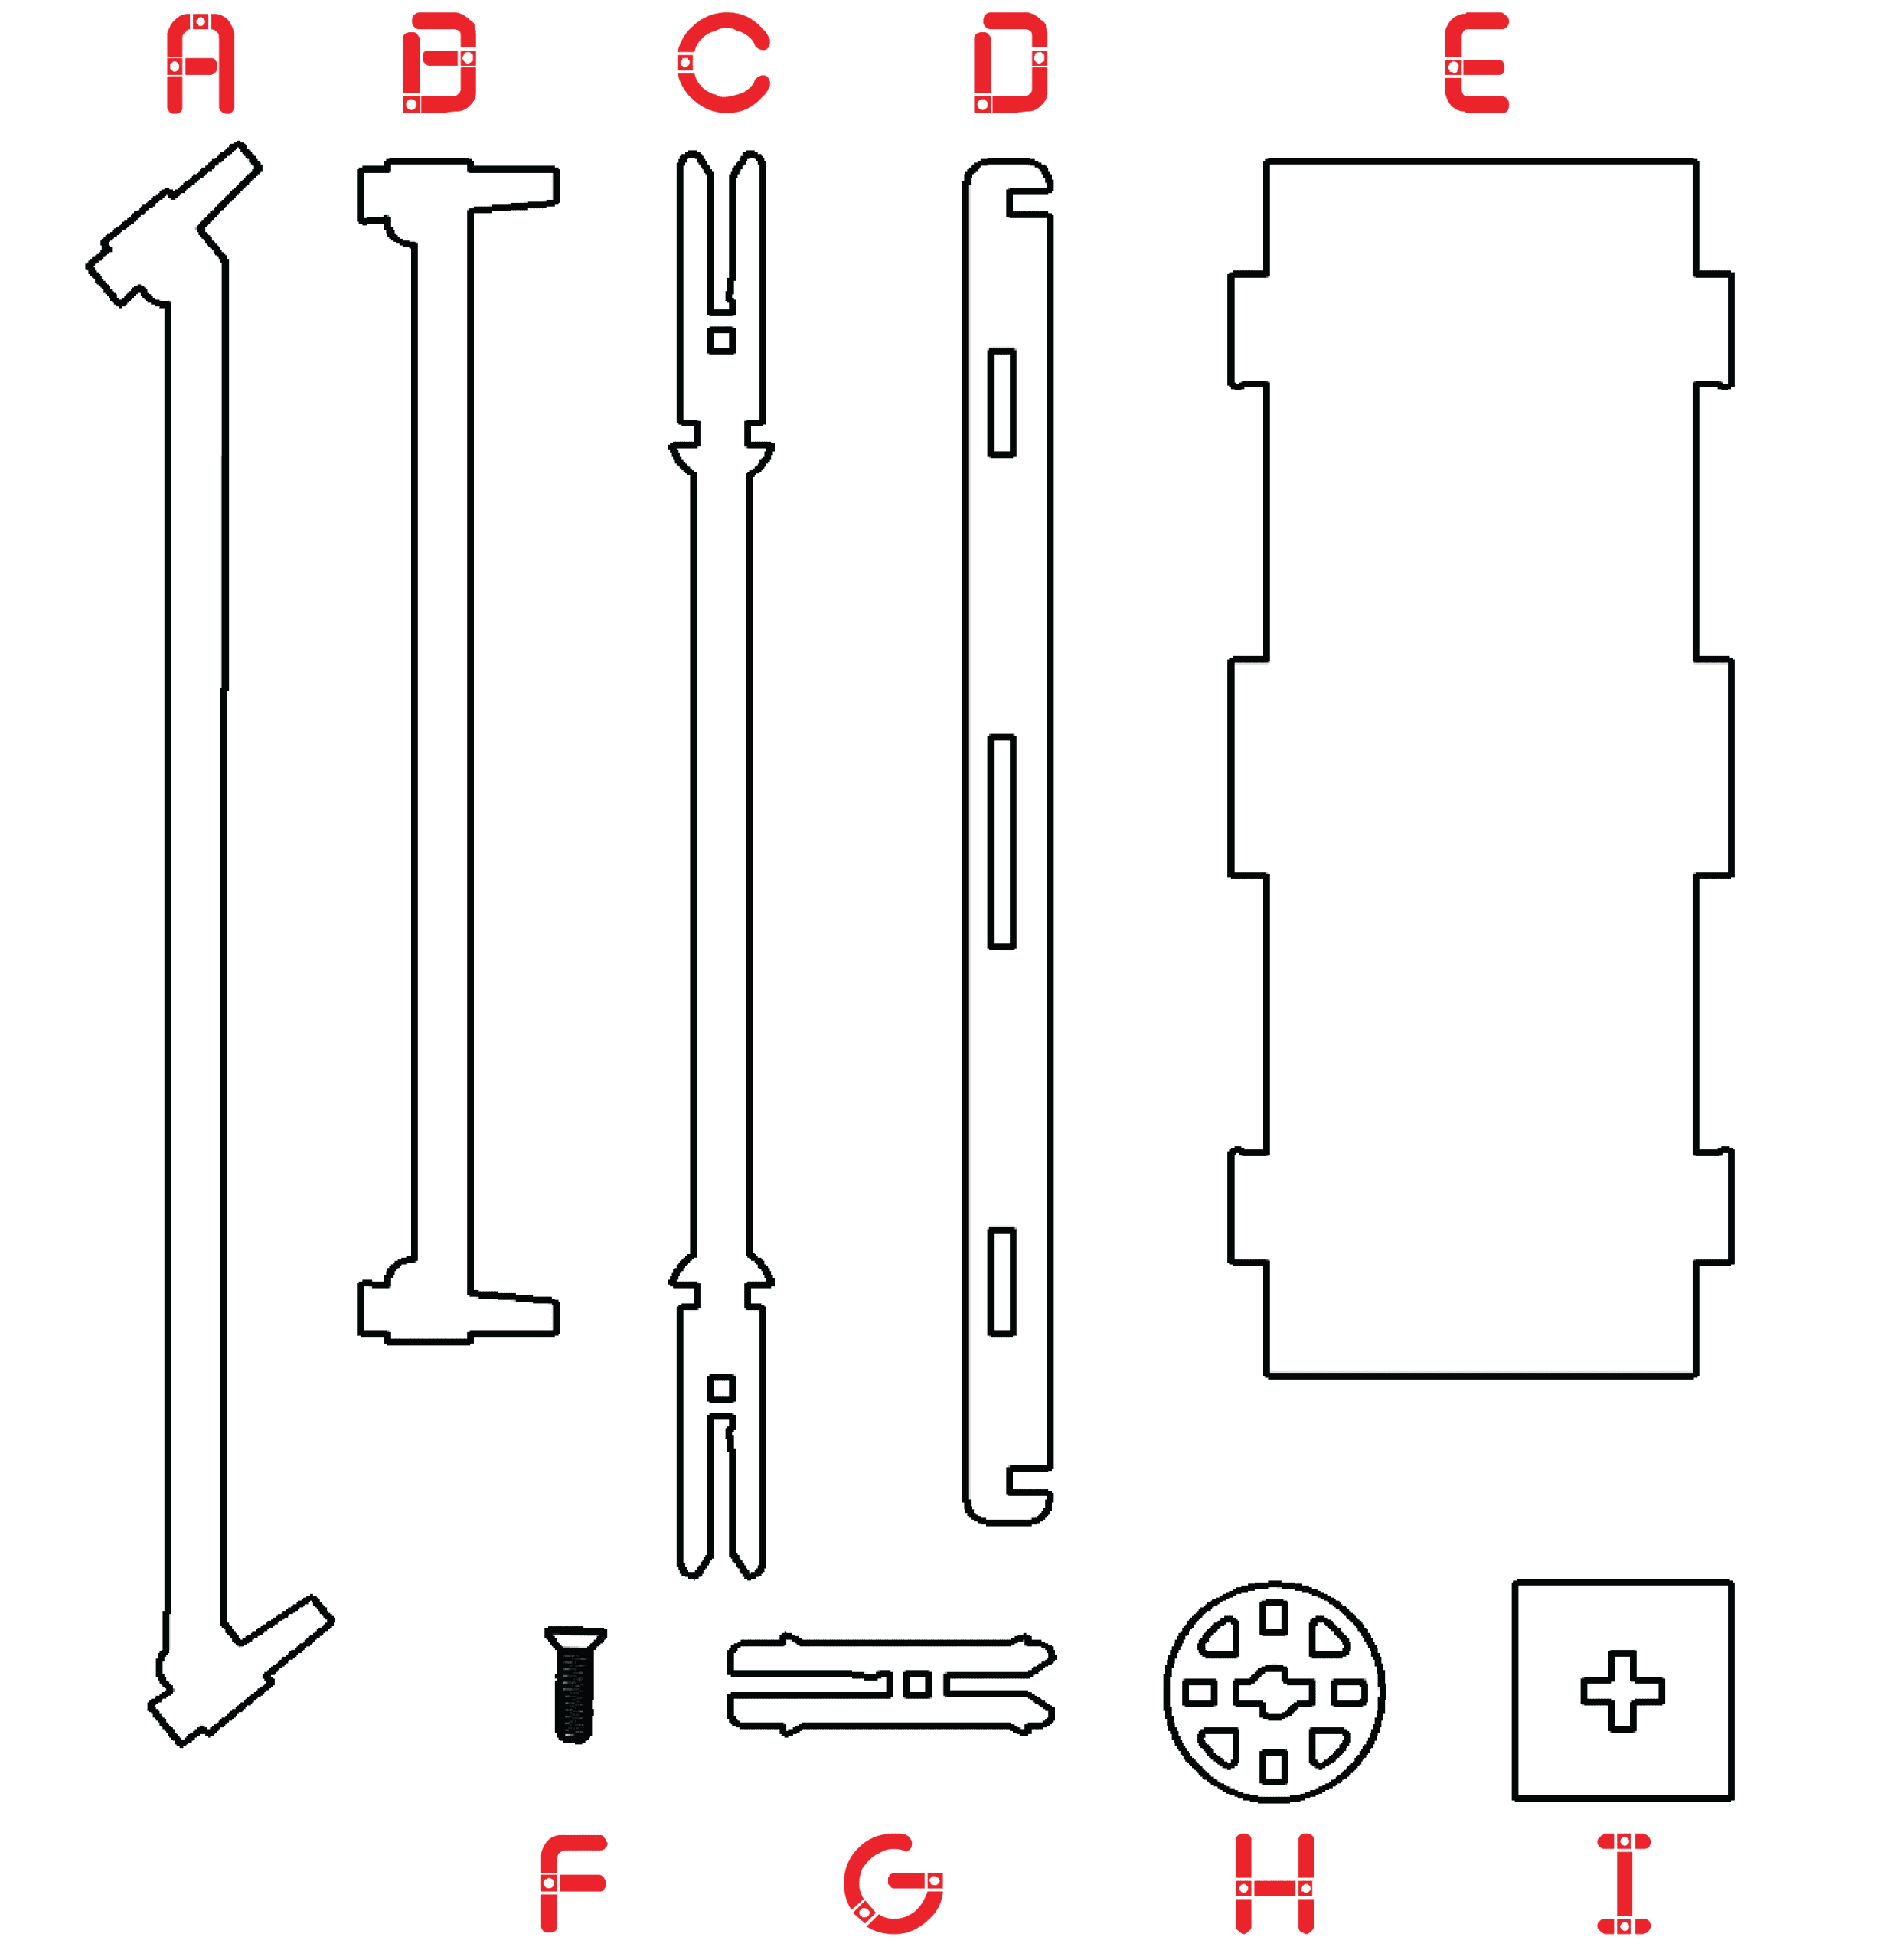
- ADiagonal Brace (x12+)
- BLedger (x24)
- CStandard (x12)
- DPlank Rail (x12)
- EPlank (x6)
- F#6 x 1/2" Screw (x12+)
- GBase Collar (x12)
- HRosette (x18+)
- IBase Plate (x12+)
Build Steps
Step 1
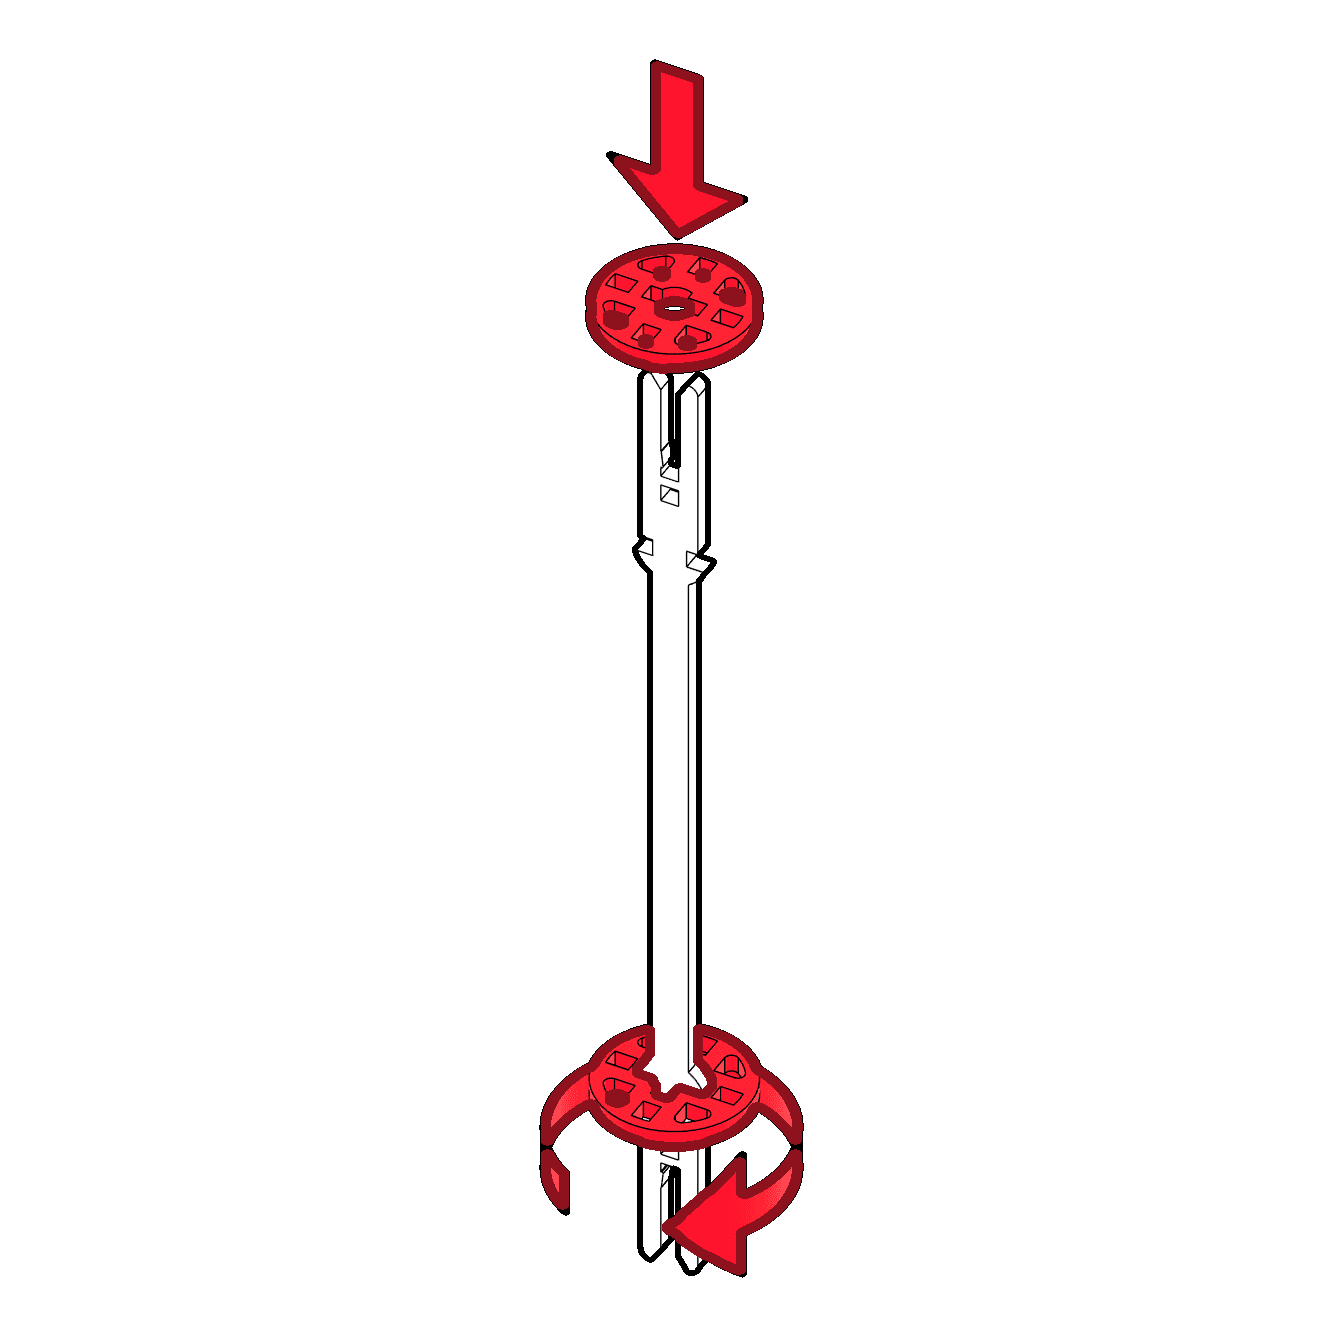
Slide a Rosette (H) onto both sides of a Standard (C) until it stops. Turn the rosette 90° to lock it in place.
Step 2
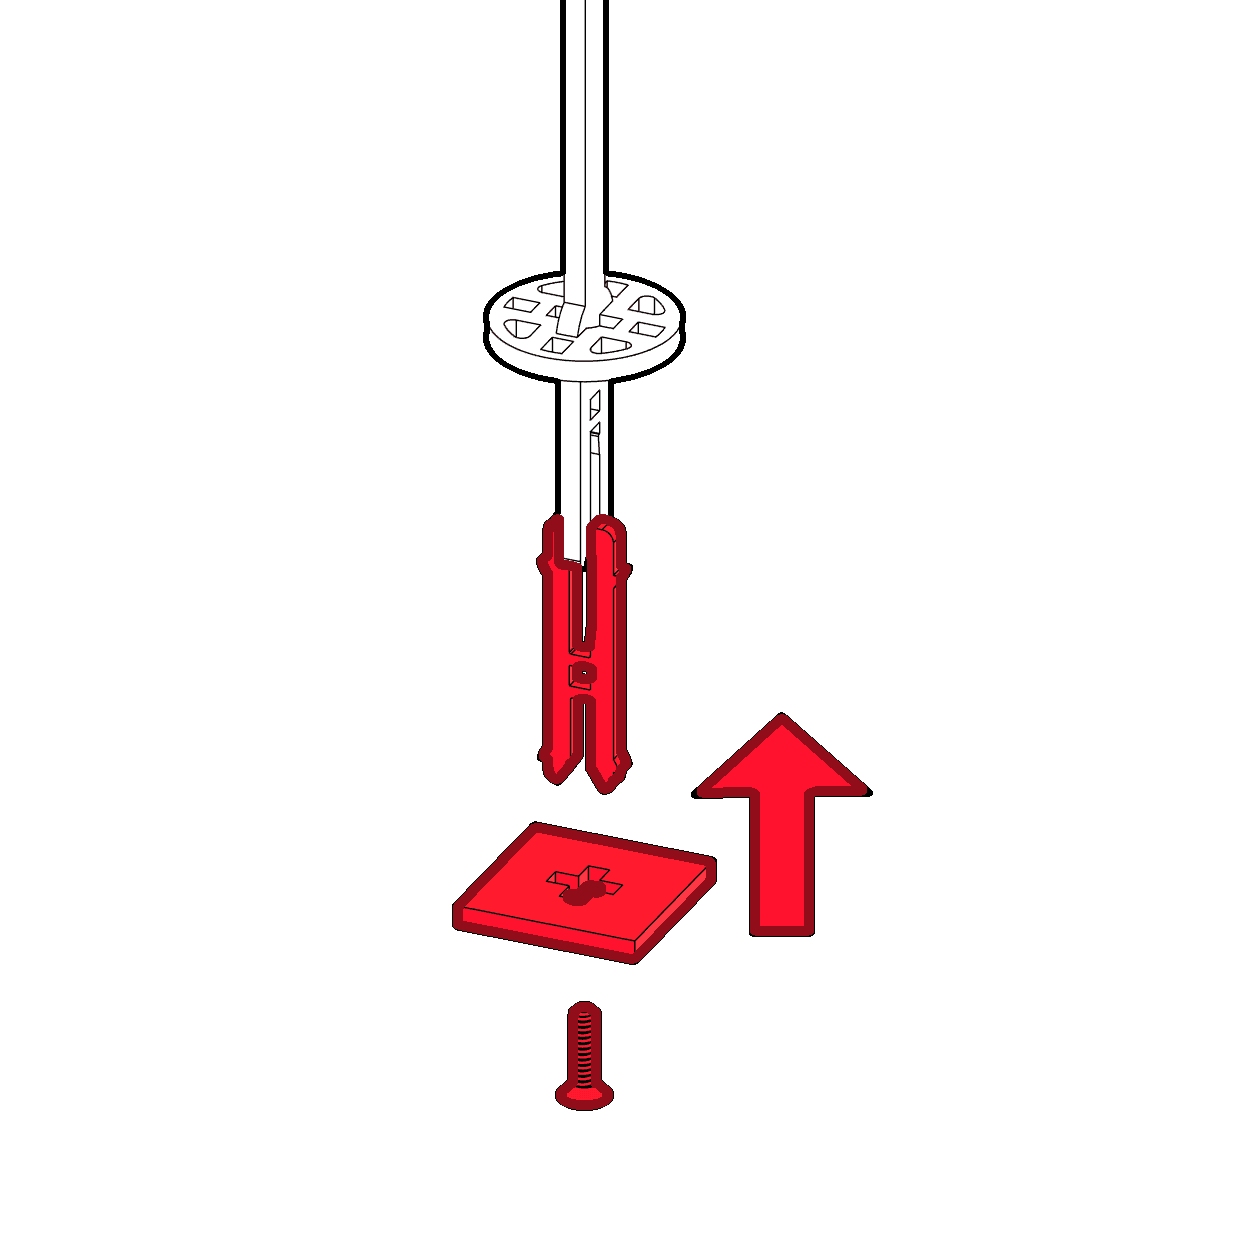
Connect the Base Collar (G) and Base Plate (I) using a Screw (F). Make sure the foot locks into the Rosette (H) holes.
Note - You may want to turn this upside down to screw it in.
Note - You may want to turn this upside down to screw it in.
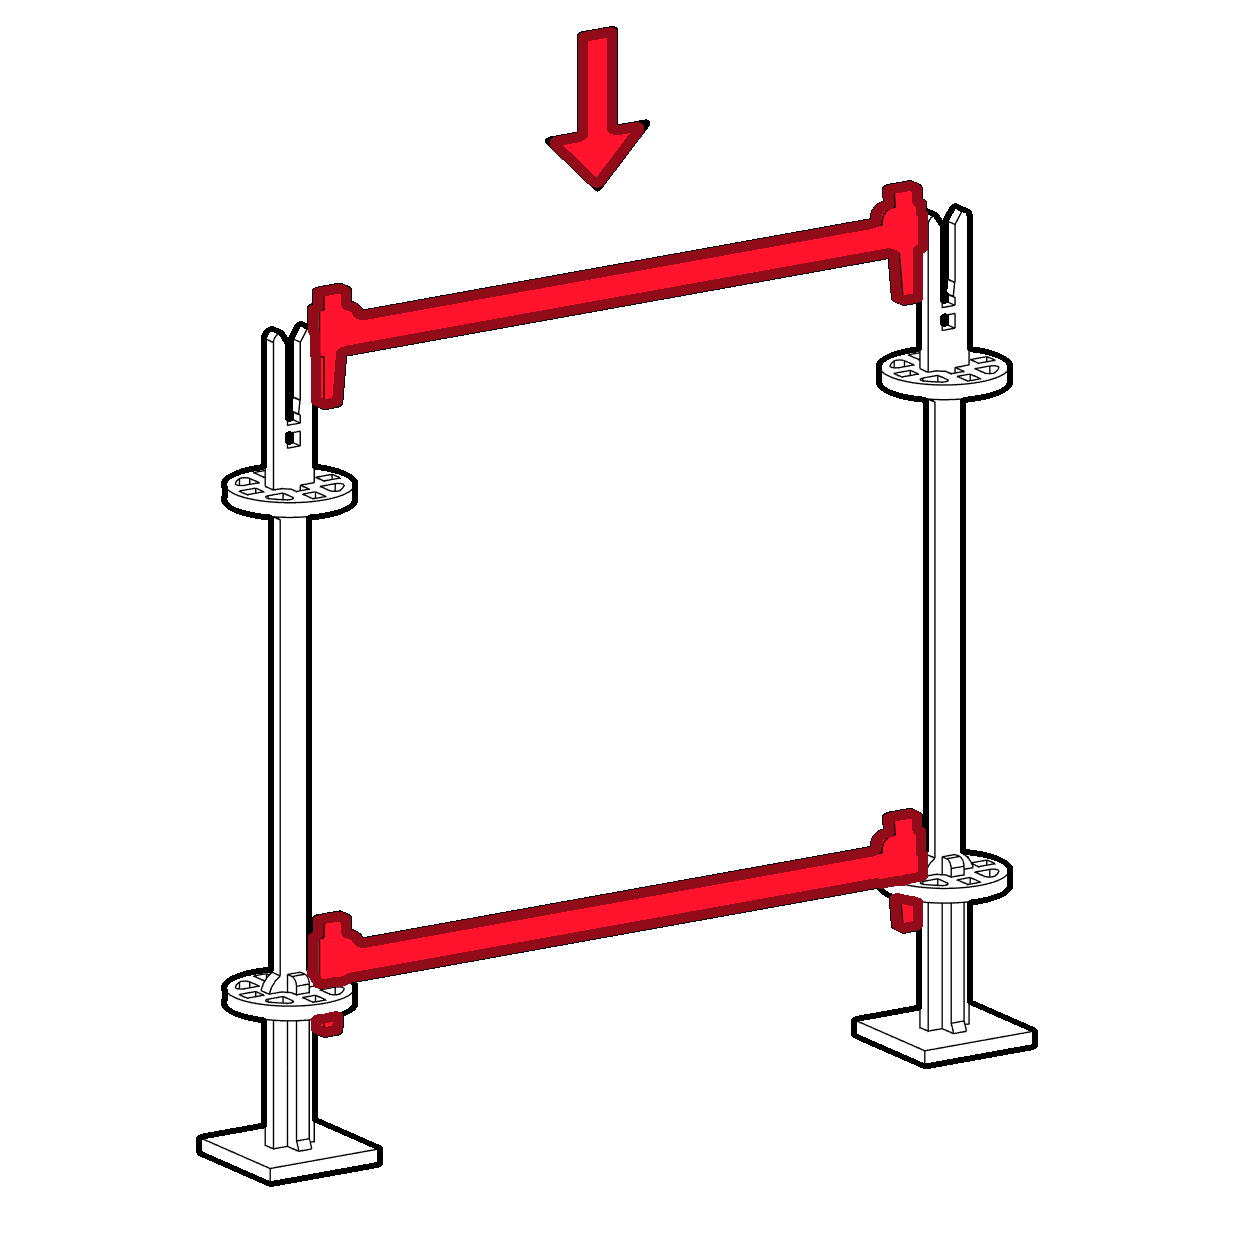
Step 3
Build a second standard repeating steps 1-2. Connect the two standards using 2 Ledgers (B).
Note - It may be easier to build this step while it is lying on a table.
Note - It may be easier to build this step while it is lying on a table.
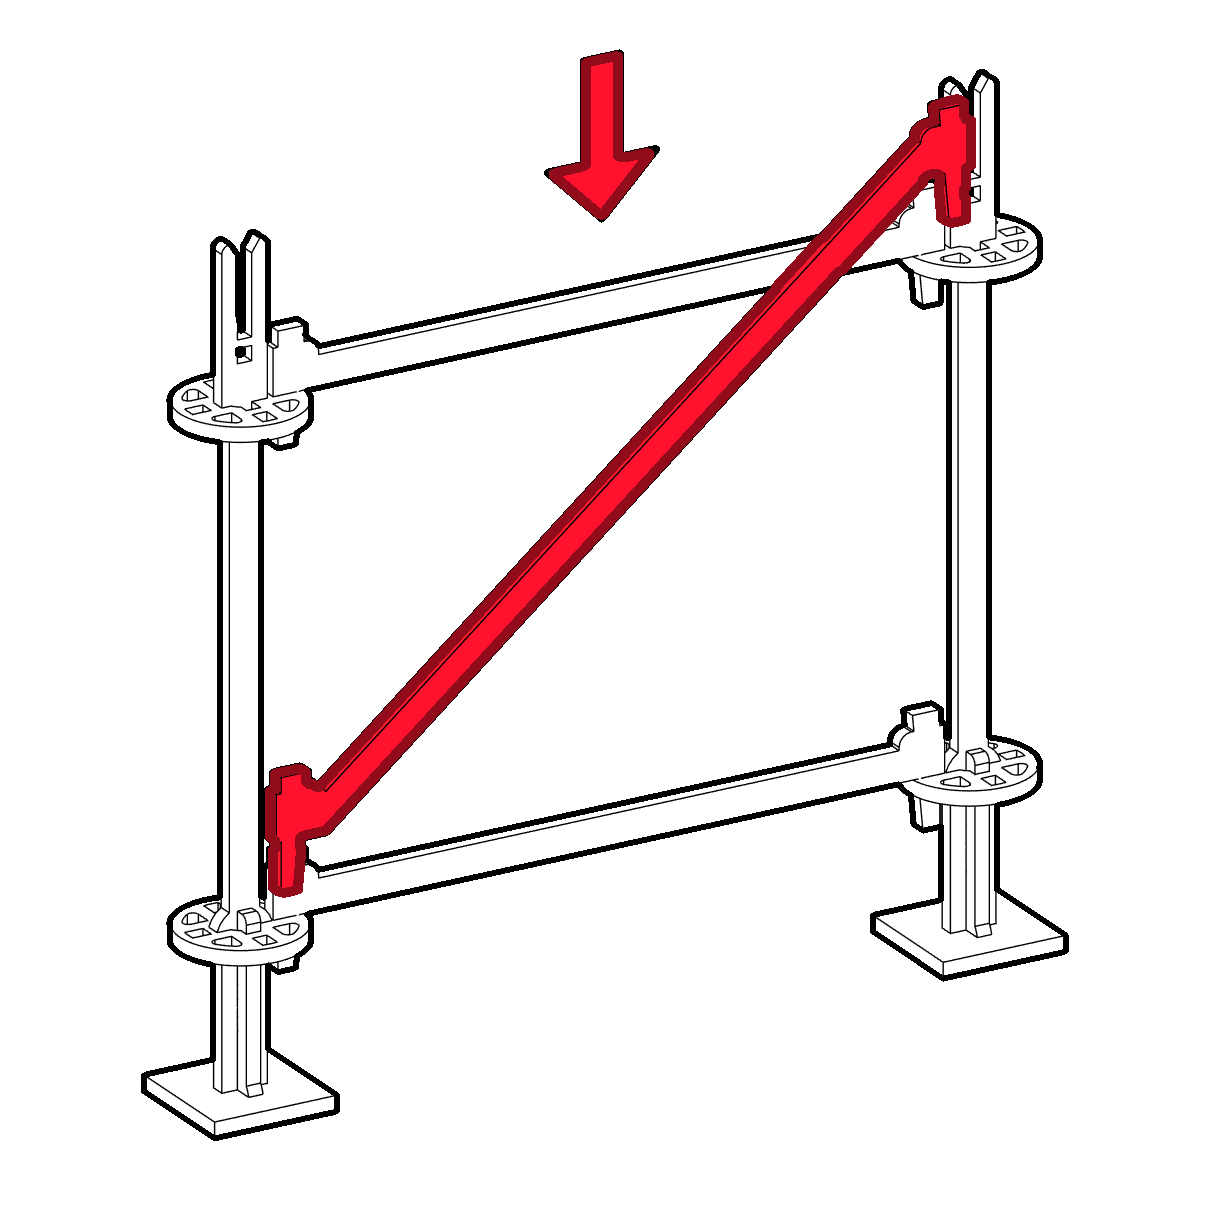
Step 4
Attach 1 Diagonal Brace (A) into the triangle-shaped holes beside the straight brace. This adds stability to the scaffolding.
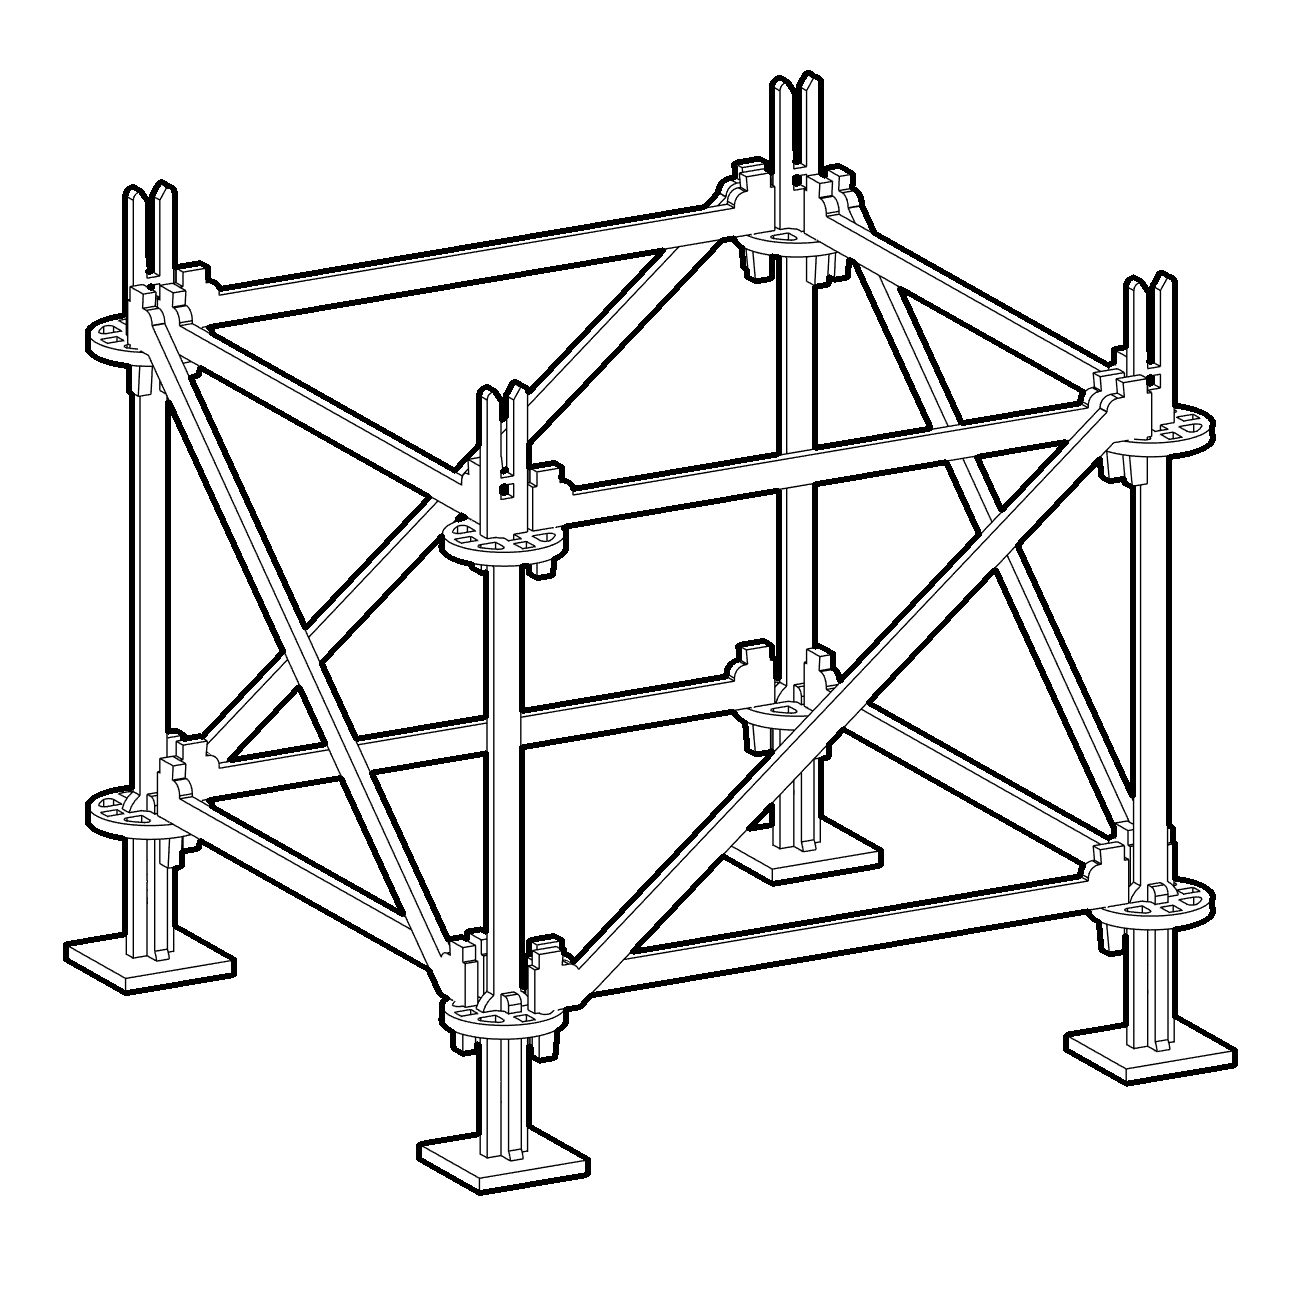
Step 5
Repeat steps 1–4 to build the rest of the scaffolding frame.
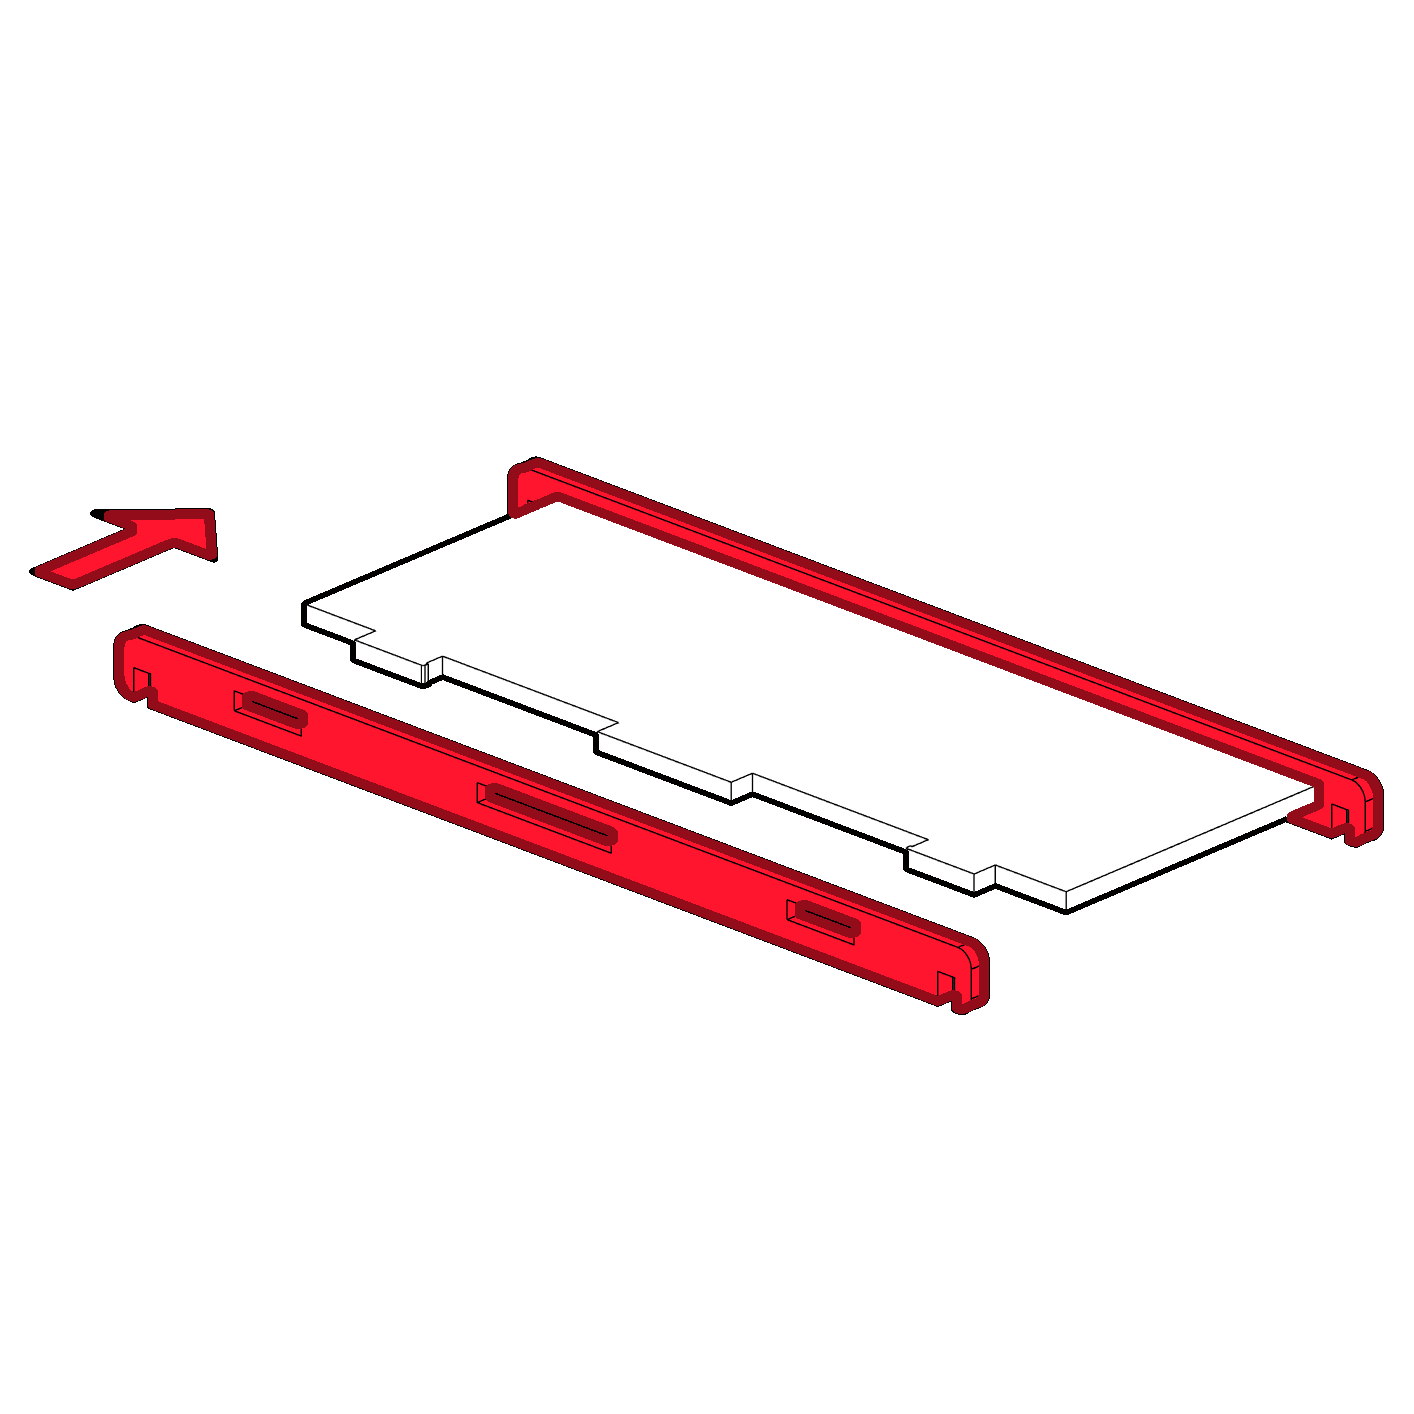
Step 6
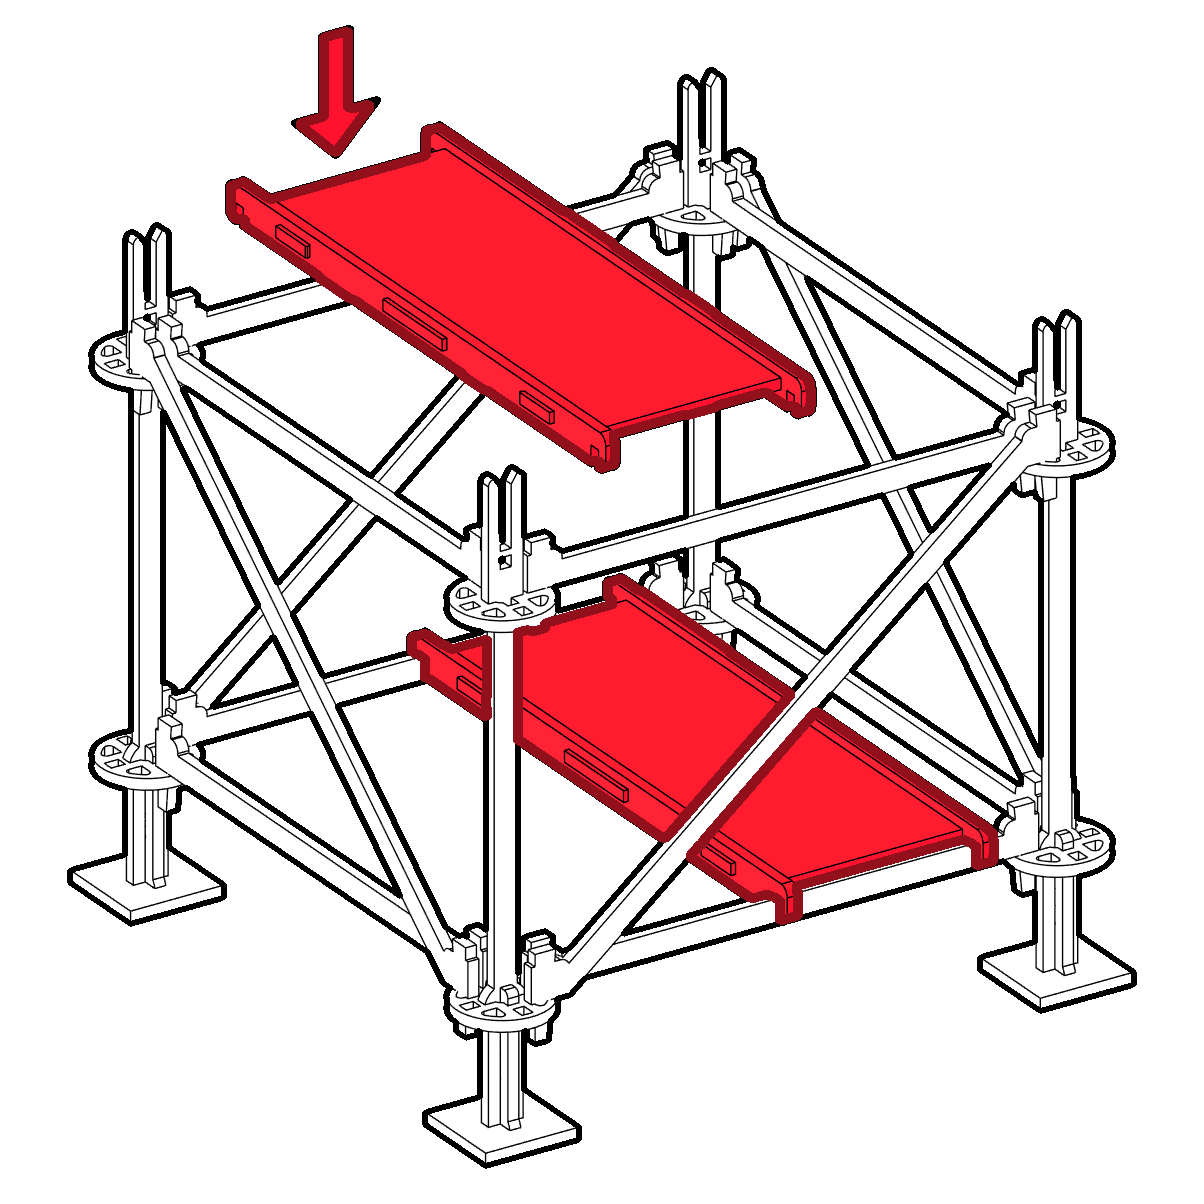
Click the Plank (E) and the Plank Rails (D) together to create the working platform.
Step 7
Place the working platform rails (D) onto the Ledgers (B).
Step 8
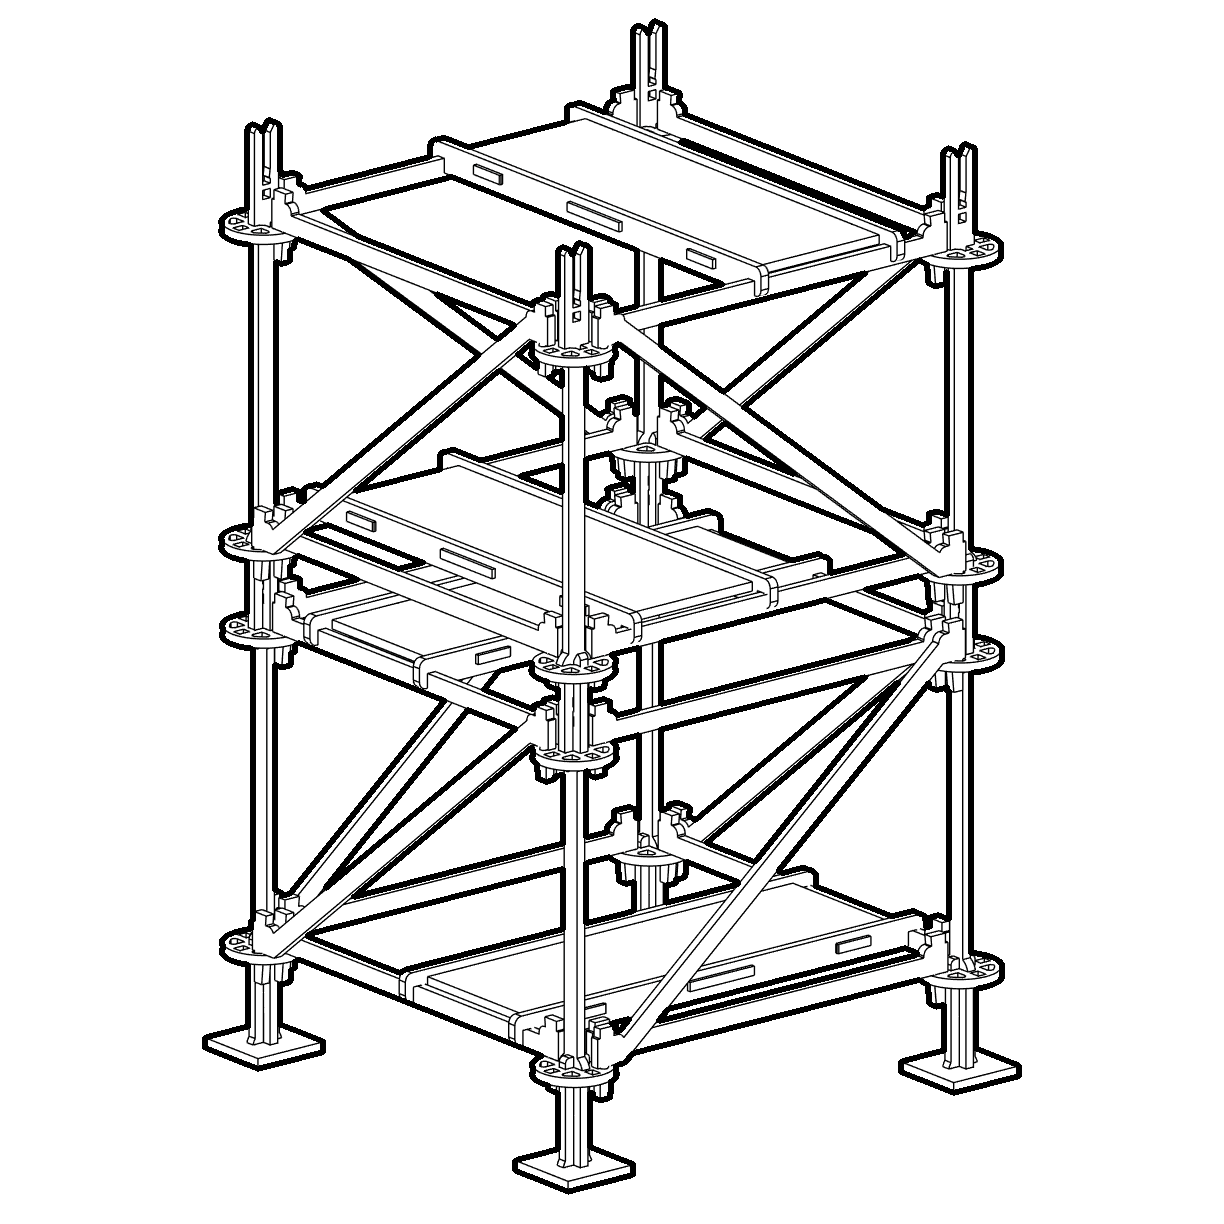
Congratulations, your scaffolding is now complete! Stack the sections together to reach higher areas safely in construction.