
Tiny EV
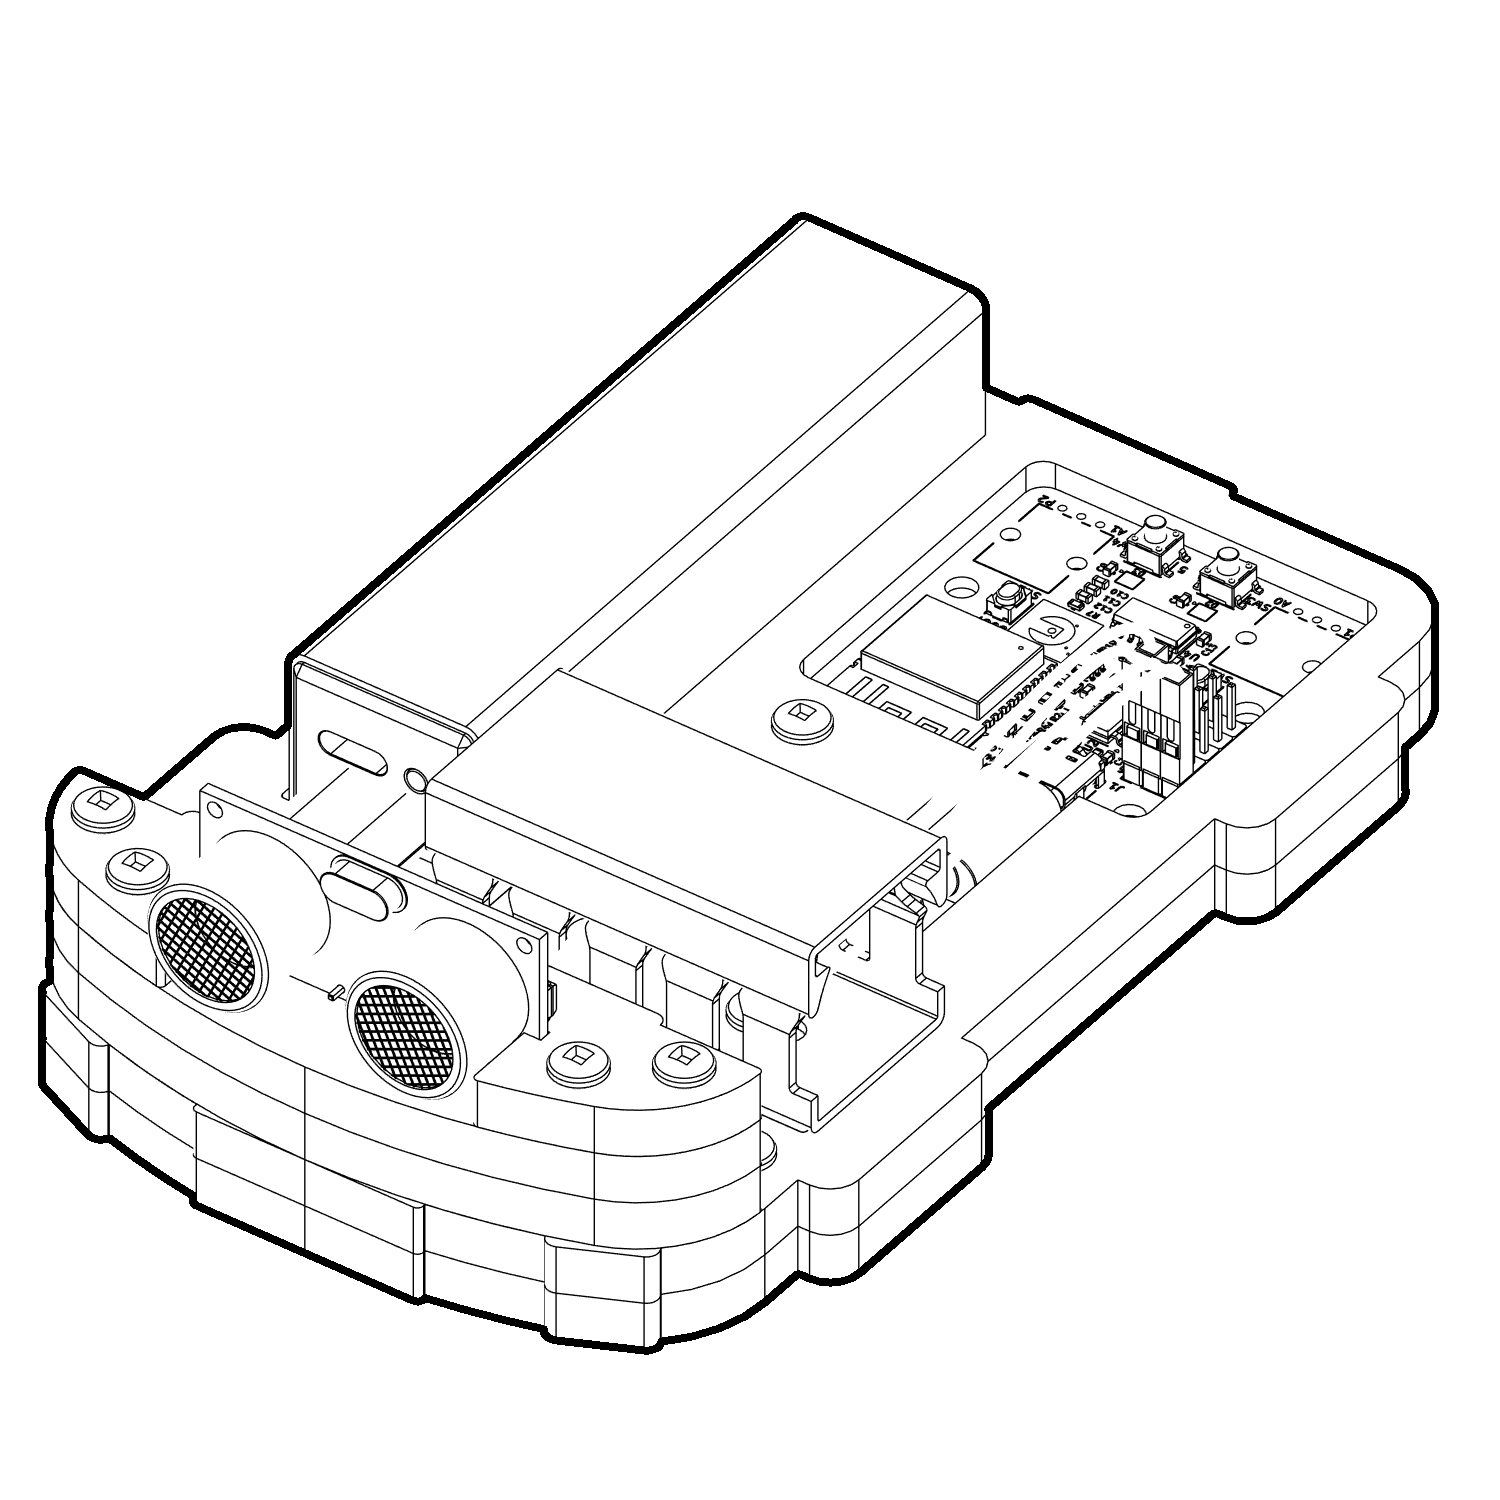
Overview
Discover how electric vehicles sense obstacles and navigate the world around them.Electric vehicles use sensors to understand what is happening around them. These sensors can detect nearby objects, helping vehicles know when something is in their path. This technology is used for features like parking assistance, obstacle detection, and other driver-assistance systems.
In this build, we will use an ultrasonic distance sensor to give the Tiny EV a way to “see” what’s in front of it. As we move an object closer to the car, the sensor will detect the distance and the indicator lights will show us how close you are.
Skills + Goals
Understand how a vehicle senses its environment
How a vehicle "feels" the world around it using a sensor, and why sensing is the first step in avoiding a collision.
Understand how an ultrasonic sensor measures distance
How the sensor sends out a sound pulse and times the echo to calculate how far away an object is, and how that compares to LiDAR on a real self-driving car.
Demonstrate basic hands-on assembly and wiring
Build the wooden vehicle, mount the ultrasonic sensor on the front, and connect the sensor to the ESP-32 Animate board correctly.
Connect data to a decision using if–then logic
Turn a distance reading into an action with simple rules - green when the path is clear, yellow under ~20 cm, red under ~10 cm - the same logic behind automatic emergency braking.
Gain insight into the real-world context
Learn how EVs and autonomous vehicles use sensors for collision mitigation, parking assist, and emergency braking, and why real cars combine several sensor types so one covers another's weaknesses.
Age 13+
Time 30 min
Materials
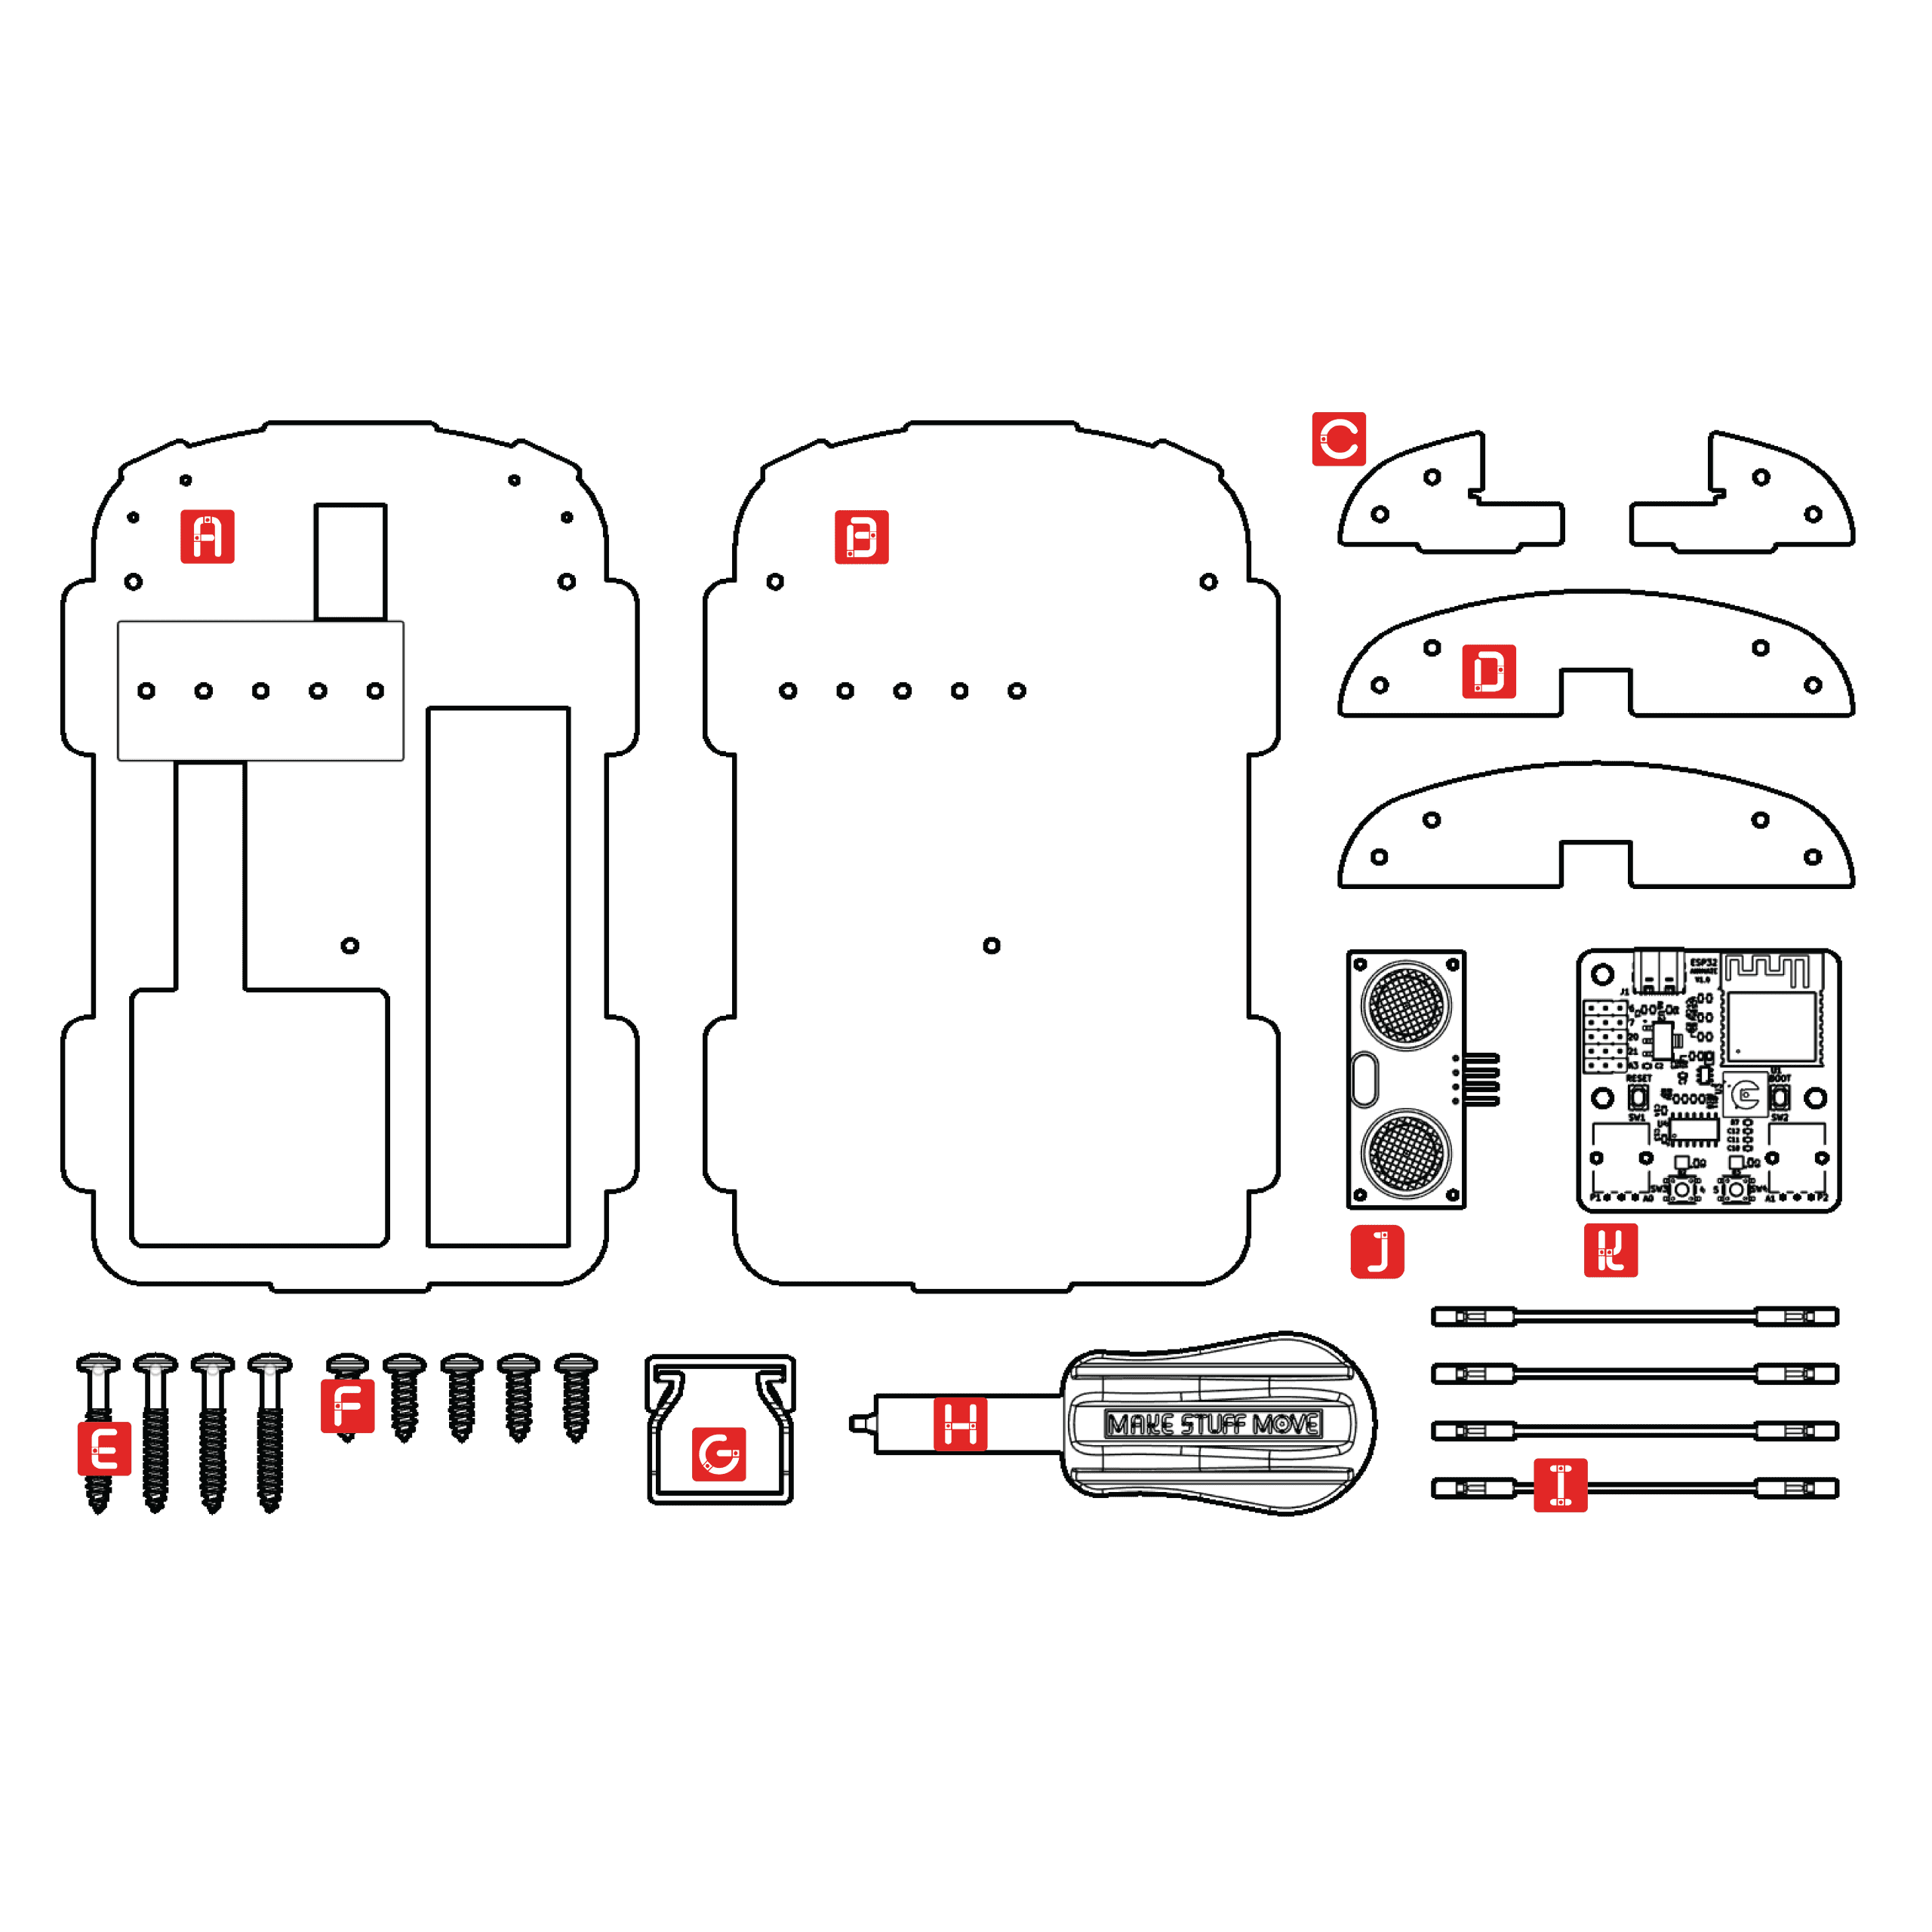
- ABase - Top
- BBase - Bottom
- CSensor Holder (x2)
- DSensor Riser (x2)
- E#6 x 1in (x4)
- F#6 x 1/2in (x5)
- GWire Duct
- HScrewdriver
- IJumper Wires (x4)
- JUltrasonic Distance Sensor
- KESP32-Animate Board
Build Steps
Step 1
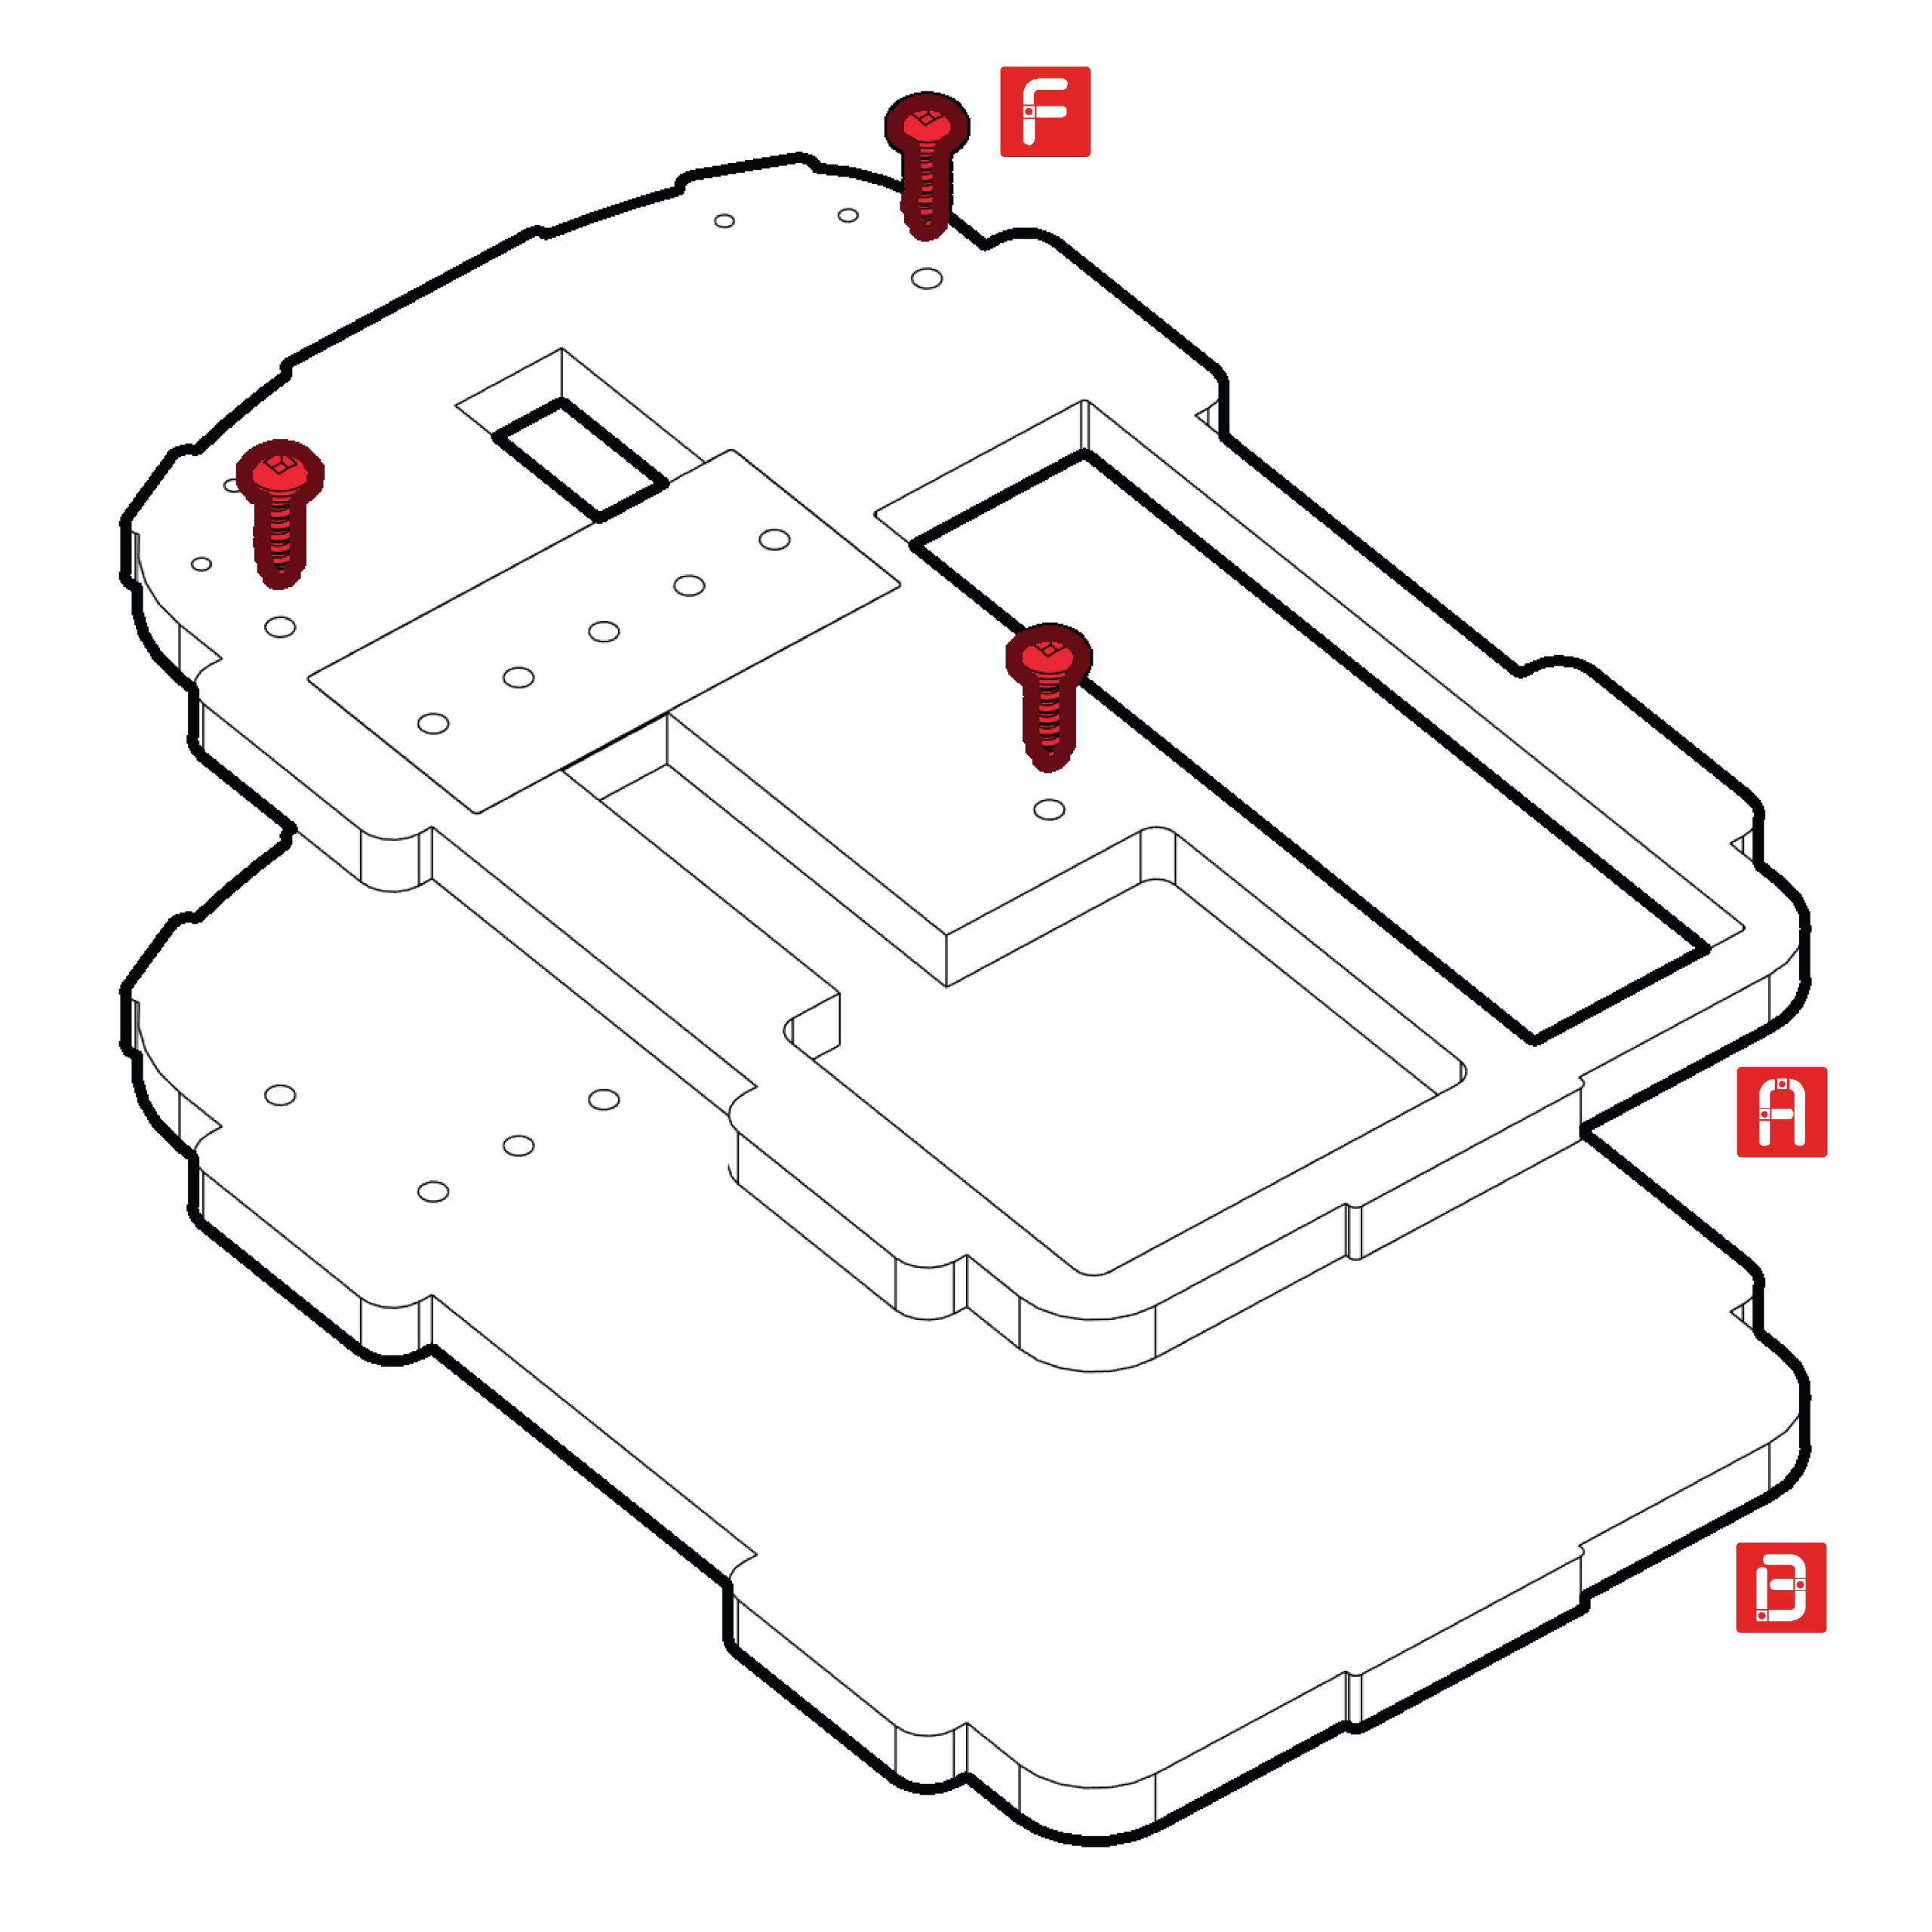
Using the screwdriver, screw together the Base Top (A) and Base Bottom (B) with the #6 x 1/2in Screws (F).
Step 2
Using the screwdriver, screw together the Sensor Holders (C) and the Sensor Risers (D) with the #6 x 1in Screws (E).

Step 3
Find two holes that best line up with the holes in the Wire Duct (G). Using the screwdriver, screw the Wire Duct (G) to the base with the #6 x 1/2in Screws (F).

Step 4
Using the Jumper Wires (I), follow the diagram to correctly connect the ESP32-Animate Board (K) to the Ultrasonic Distance Sensor (J).

Step 5
Using the Jumper Wires (I), follow the diagram to correctly connect the ESP32-Animate Board (K) to the Ultrasonic Distance Sensor (J).

Step 6
Using the Jumper Wires (I), follow the diagram to correctly connect the ESP32-Animate Board (K) to the Ultrasonic Distance Sensor (J).

Step 7
Using the Jumper Wires (I), follow the diagram to correctly connect the ESP32-Animate Board (K) to the Ultrasonic Distance Sensor (J).

Step 8
Place the Ultrasonic Distance Sensor (J) into the Sensor Holders (C). Feed the Jumper Wires (I) into the Wire Duct (G) and place the ESP32-Animate Board (K) in the base.
Place the battery in the base. Plug the USB-A port into the battery and feed the wire through the wire duct. Plug the USB-C port of the cable into the ESP32-Animate Board (K).
Place the battery in the base. Plug the USB-A port into the battery and feed the wire through the wire duct. Plug the USB-C port of the cable into the ESP32-Animate Board (K).

Step 9
Slide the cover of the Wire Duct (G) to contain the wires.

Step 10
Complete! Great job!

 English
  French